How to Create an Expense Report with Falcon’s Expense Tracker App
Table of Contents
Learn how to create an expense report with Falcon Expenses mobile expense tracker.
Falcon Expenses Background
Falcon Expenses is an expense and mileage tracker app for self-employed and small businesses.
Use Falcon Expenses to track mileage, store receipts, enter cash expenses, and log billable hours. In addition, create expense reports and email them to anyone, all from your phone.
This post is about how to create expense reports using Falcon Expenses expense tracker app expense report template.
Falcon provides a simple and automated solution for self-employed to meet IRS expense record-keeping requirements.
What is an Expense Report in Falcon Expenses?
An expense report is a collection of expenses that were entered or captured with Falcon Expenses.
When you enter a cash expense, mileage expense, time log, or scan a receipt you make an individual expense entry.
When creating an expense report, individual expenses are grouped together into one report. For example, a salesperson might have fifteen expenses for reimbursement after returning from a business trip. Ideally, it makes the most sense to submit all of these expenses in one report.
Create Expense Reports with Falcon Expenses
There are four ways to create an expense report in Falcon.
This might sound daunting at first, but it’s not.
Let us explain.
When we built Falcon our vision was to make a fully mobile expense tracker.
More specifically, we wanted our users to be able to do everything on their mobile phones, with ease. To not have to go to a desktop. Therefore, at each point in the experience where the user might need to create a report, we made that possible.
Download Falcon Expenses if you have not already done so before you get started. You need the app in order to check out these features.
Download Falcon Expenses
If you’re on a desktop it’s best to use your phone and search for Falcon Expenses on the app store.
Create an Expense Report from the Main Homepage
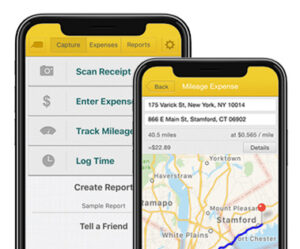
When you first open Falcon Expenses the screen you see is the Capture screen.
From this screen you can select one of the options to enter an expense. For example, the buttons available for expense entry are Scan Receipt, Enter Expense, Track Mileage, Log Time. A button labeled ‘Create Report’ is located below these buttons.
Follow these steps:
- Tap on the button labeled ‘Create Report’. This takes you to a ‘Create Report’ form.
- On the ‘Create Report’ form enter a Report Name (required) and Reason (optional).
- Tap the teal button in upper right labeled ‘Create’.
After, you are taken to the expense report detail view. However, there are no expenses in your report yet. Therefore, the view is empty. The next step is how to add the expenses. - Tap the ‘Add Expenses’ button to add expenses to the report. This button will expose a list of options. The options available are the same as the buttons that are on the Capture Screen. These options
include: Scan Receipt, Track Mileage, Log Time. Also, there’s one additional option, which is ‘Unreported Expenses’. This button, when tapped, will take you to the expenses list, where you can select expenses that you saved earlier. Please note that this option will only work if you saved expenses earlier. - Submit your report once you’re done adding all of the expenses to your report. To submit your report tap the teal ‘Submit’ button located in the upper right. This will prompt you to enter the email address of who you want to submit the report to.
Download Falcon Expenses and check out this feature yourself.
If you’re on a desktop it’s best to use your phone and search for Falcon Expenses on the app store.
Create an Expense Report from the Expenses List
Please note that this method for creating an expense report only works if you have already saved some expenses to Falcon Expenses.
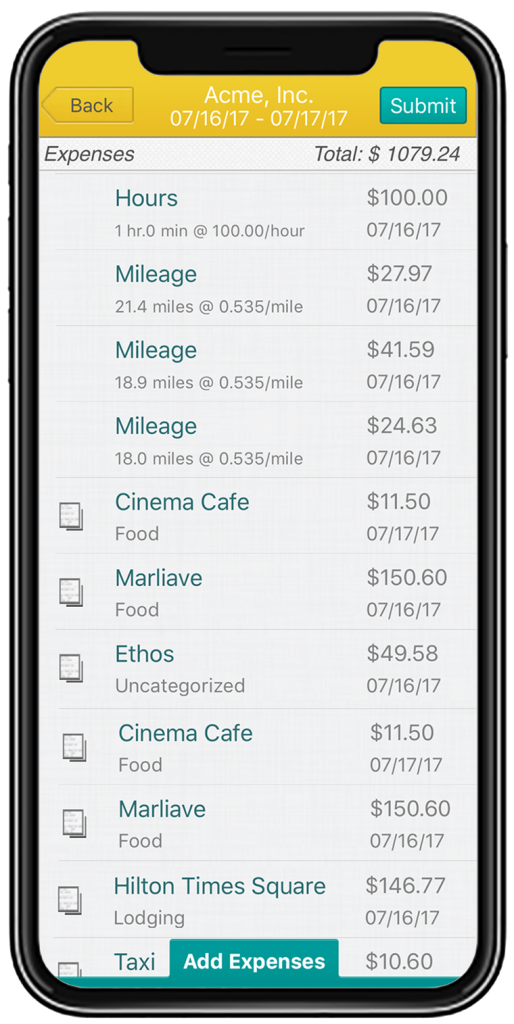
View all of the expenses you’ve entered into Falcon Expenses from the Expenses List. To access the Expenses List tap on the button located in the center of the top yellow navigation bar labeled ‘Expenses List’. Further, this list includes all reported and unreported expenses.
Follow these steps:
- Tap the check boxes next to each expense that you want to add to your expense report. When the expense if selected it will add a check mark inside the box.
- Tap on the teal ‘Add to Report’ button located at the bottom of the page. After you have selected all of the expenses that you want to include in your expense report.
- Select the ‘New Report’ option from the picker. Enter a Report Name (required) and the Reason (optional)
- Tap the teal ‘Submit’ button located in the upper right corner of the report and enter the email address of who you would like to submit the report to.
Download Falcon Expenses and check out this feature yourself.
If you’re on a desktop it’s best to use your phone and search for Falcon Expenses on the app store.
Create an Expense Report from the the Reports Page
The report creation process from the Reports Page basically follows the same steps as the process of creating a report from the ‘Create Report’ button that is located on the Capture Screen. Access the reports page by tapping on the ‘Reports’ button located in the upper right of the top yellow navigation bar. The steps are repeated below.
Follow these steps:
- Tap teal report icon located in upper right. This takes your to a ‘Create Report’ form.
- On the ‘Create Report’ form enter a Report Name (required) and Reason (optional).
- Tap the teal button in upper right labeled ‘Create’.
After, you are taken to the expense report detail view. However, there are no expenses in your report yet. Therefore, the view is empty. The next step is how to add the expenses. - Tap the ‘Add Expenses’ button to add expenses to the expense report. This button will expose a list of options. The options available are the same as the buttons that are on the Capture Screen. These options
include: Scan Receipt, Track Mileage, Log Time. Also, there’s one additional option, which is ‘Unreported Expenses’. This button, when tapped, will take you to the expenses list, where you can select expenses that you saved earlier. Please note that this option will only work if you saved expenses earlier. - Submit your report once you’re done adding all of the expenses to your report. To submit your report tap the teal ‘Submit’ button located in the upper right. This will prompt you to enter the email address of who you want to submit the expense report to.
Download Falcon Expenses and check out this feature yourself.
If you’re on a desktop it’s best to use your phone and search for Falcon Expenses on the app store.
Create an Expense Report while Entering an Expense
On each expense entry form, there’s an option to create an expense report. This makes it easy to create an expense report at the same time as entering an expense.
More specifically, a field labeled ‘Report’ is the option used to create a new report from an expense entry form. It’s located towards the bottom of the expense entry form, below the Category option. ‘Unreported’ is the default selection. Tap unreported to open a picker. The picker has an option to ‘Create New Report’.
Follow these steps:
- Tap on the field labeled ‘Unreported’. By default, when you enter a new expense that is not being entered directly to a report, this field is labeled unreported.
- A picker will open. Tap the option, ‘Create New Report’.
- Enter a Report Name (required) and a Reason (optional). Tap ‘Create’.
- Tap the ‘Submit’ button in the upper right. Enter the email address of who you want to submit the expense report to. Also, before submitting the expense report, you can add more expenses to it.
Download Falcon Expenses and check out this feature yourself.
If you’re on a desktop it’s best to use your phone and search for Falcon Expenses on the app store.
About Falcon Expenses
Falcon Expenses is a top-rated expense and mileage tracker app for self-employed and small businesses to track expenses and tax deductions. Falcon customers record $6,600, on average, in annual tax deductions. Get started today. The longer you wait, the more tax deductions you miss.
Automatically track mileage expenses and expenses, keep an odometer log, receipt vault and log billable hours. Quickly organize expenses by time period, project, or client. Easily create expense reports and mileage logs with your expense data for email to anyone in PDF or spreadsheet formats, all from your phone. Falcon’s expense report template is IRS compliant. Use for keeping track of tax deductions, reimbursements, taxes, record keeping, and more. Falcon Expenses is great for self-employed, freelancers, realtors, delivery drivers, couriers, business travelers, truckers, and more.
Was this article helpful?

I used to travel a lot for work. Doing my expenses frustrated me. I would delay submitting them and when I did, I would spend hours taping receipts to paper to scan for my boss. I knew there was a better solution, and I had a background in productivity software, so I created Falcon Expenses. I enjoy creating software that makes people’s lives easier.
In addition, I’m an avid skier and I enjoy hiking, sailing, and cooking.